Note to the bead makers: These are not my beads. They are Glassbaker's from my jewelry making days.
Open your photo in photoshop.
Make any corrections.
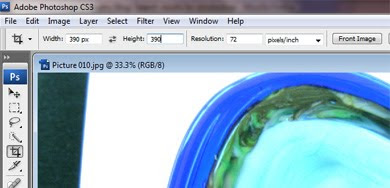
Size it down for web viewing - 72 dpi - making sure you have one corner of the photo vacant to work in. The Divas need all photos to be the same size because we turn our bead photos into a gif that everyone can use to promote the Jewelry Challenge. That size is 390 px x 390 px.
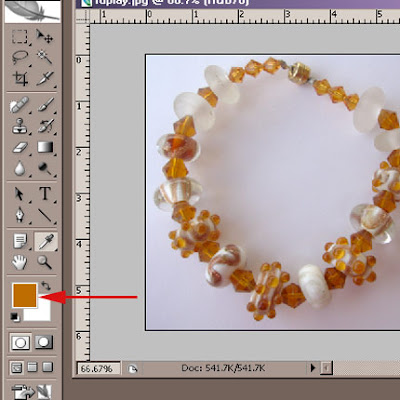
Now we'll use the tool palette to make a corner banner (or see my notes below to make other shapes). Your tools palette is on the left side of the screen in photoshop. We will be using five tools in this order (photo below):
- Eyedropper - allows you to select colors from your photo.
- Color palette - another way to choose color. In this tut, we are really just looking at this tool.
- Pen - Creates anchor points for the banner.
- Move tool - moves objects around. You must be on the same layer as the object you are moving. Your layers palette is to the right. But if you work in the order listed here, you will always be on the "right" layer and shouldn't have to worry about that.
- Text tool - allows you to type on your photo.

Selecting the Corner: Choose the eyedropper tool and go to your photo. Click on the predominate color and you will see this color appear in the color palette (see red arrow). You may have to click around a few times to find just the right shade.
Choose your pen tool and the vacant corner. You will click three times to draw a triangle. You can see where I clicked in the photo.
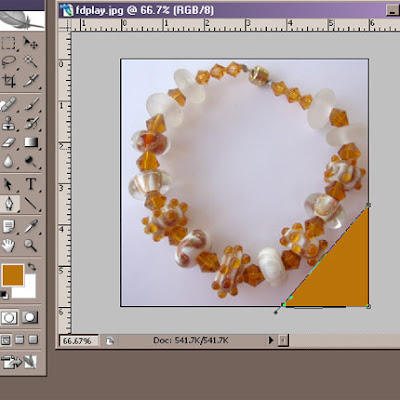
Try to stay as close to the border of the photo as possible. In three clicks the lines will join and fill with that color you just selected.
Move the Selection: If you don't like exactly where you placed this, choose your move tool (arrow, upper right of tools palette) and move it a little.
Typing your Message: Choose the Type tool (The big letter T on the tools palette). Chose your font up top and click into the picture. Start typing your message. Chose the move tool again when you are done typing.

Mine is a little small but you can see what I wrote over in the layers palette to the right.
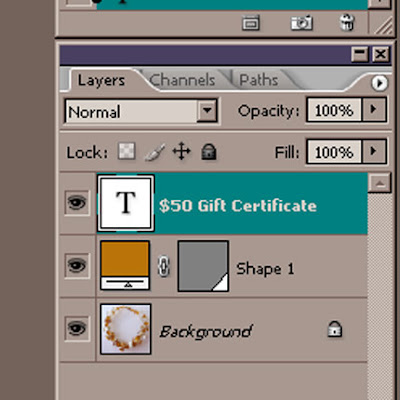 Move the text over your colored banner.
Sizing / Rotating the Words: Now I need my type a little bigger. On the keyboard, hold down your control key and hit the letter T. This is to access the transform tool (also found under the Edit Menu: Free Transform). This allows you to move the text to the colored corner, spin it around and stretch it to fit.
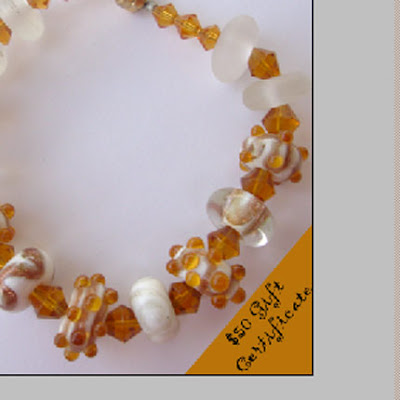
Choose File: Save for Web. Make any last sizing adjustments and save the file.
 The final image.
*To make other shapes: See the little dotted square in the upper left of the tool palette photo above? That's a rectangular selection tool. It's only purpose is to select something. If you click on the darkened lower right corner of that tool, you'll find other shapes: Ellipse, vertical and horizontal lines. The last two only select one pixel wide or tall and we won't be using those.
To make a rectangle or ellipse, select the appropriate tool and draw with the mouse. Try not to cover your bead. If you mess up, do it again - the first selection will disappear.
Once the area you want is selected, select the color you want to fill it with as described above. Go to image fill, foreground color and OK. Then type your message.
To make a square or circle, again select the rectangle or ellipse but HOLD THE SHIFT KEY while selecting and it keeps your width and height proportional.
Other fun shapes: You can add to a shape by holding the control key and drawing another shape that intersects the first. You can subtract from a shape by holding the alt key and drawing an intersecting shape. The overlapping area will be deleted!



4 comments:
thanks for the tute Holly! I'll have to give it a try!
Thank you so much Holly! Off to take a picture of something right now! Can't wait to try this out!
Thanks Holly!
Great!
I'll take my pic and cornerify it tonight. Thanks for sharing that!
Post a Comment