

Monday, April 5, 2010
Waiting...
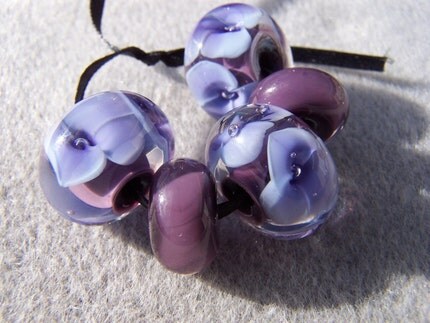
I feel like EVERYTHING is waiting on me lately! I've been ingnoring a lot of stuff to deal with taxes and now... that new website is calling my name. So for now... these beauties are just waiting...


Thursday, April 1, 2010
Almond Blossoms

Well, I did it! If you read my post yesterday, you already know I was running late with my Art Bead Scene entry. And I woke up with a dream of how to design the piece! In the end, the aqua bellflower wasn't enough but this Evil Dark Purple one was! It added the punch of pink I felt the focal lacked.
This March Art Bead Scene contest, inspired by the Van Gogh painting called Almond Blossoms.
ABOUT THE BEADS: The art glass beads were handmade by me, Holly Dare of Holly's Folly ~ Glass. The focal is made of layers of opaque and transparent teal glass for depth. The flowers are white with a bit of pink. I didn't want the pink to overpower the piece.
The Bellflower dangle is an opaque pink on stainless steel wire.

In my efforts to continue to educate the folks about the wonderful Revolution Money Exchange, I am offering this pendant at a $10 discount to anyone who checks out using RME. The Revolution Money Exchange does not take money from vendors for using it's services (or from customers either!) It's FREE for both parties!!! Help a struggling artist keep more of her hard earned money and save money too! That's a bargain all around! Here it's $45.00. When I move it to my website the price will be $55.

Wednesday, March 31, 2010
Under the Gun...
OH, but I'm a bundle of stress today! Not only am I frantically finishing taxes for the tax guy on Saturday, I have two blog posts to write...not counting this one! Another in the wings for the Fire Divas jewelry challenge on Friday, text for a bio due and... if all that is not enough... I've got a hankering to tear down and rebuild my website (these urges always hit at inopportune times!) which distracts me from my deadlines by making articles on web code interesting! And then... last minute Lucy that I am... My Art Bead Scene project is due TODAY!
I gave a preview of the beads here but... the ideas have come fast and furious but none seemed right! Until... I sat up in bed at 5 a.m. this morning and sketched it out!
 So, this is my plan and I'm sticking to it! I'll post some pics on the flipside of this deadline!
I gave a preview of the beads here but... the ideas have come fast and furious but none seemed right! Until... I sat up in bed at 5 a.m. this morning and sketched it out!
 So, this is my plan and I'm sticking to it! I'll post some pics on the flipside of this deadline!
Tuesday, March 30, 2010
Lucky Girl
Boy am I ever on a winning streak lately! Which I must admit feels awesome - especially while working on taxes!
I won this lovely vessel from Janel at Janel Dudley Beads (who I met in person this weekend! She's as lovely as can be and I so enjoyed having a glass buddy to share tips with!). Janel held a contest on her blog to find out about an antique bead she had. Nosey Nellie (me!) naturally had the answer. But the drawing was fair and square and her kitty picked me as the winner... you can read the hilarious blog entry about the choosing of the name here.

The photo does NOT do it justice...isn't that the case with all lampwork? In person, the pale colors range from a pretty baby blue to a smattering of olive. It's a stunner! I just love and treasure it!
But that's not all. Melissa Mesara at One Earred Pig was having a drawing for the followers of her Facebook Fan page. And what do you know? I won the drawing. She didn't really advertise what she was mailing out and my heart leaped a beat when I opened the box and saw this:

It's so gorgeous!
Nothing like having some new glass to sport about town on these lovely spring days!
I won this lovely vessel from Janel at Janel Dudley Beads (who I met in person this weekend! She's as lovely as can be and I so enjoyed having a glass buddy to share tips with!). Janel held a contest on her blog to find out about an antique bead she had. Nosey Nellie (me!) naturally had the answer. But the drawing was fair and square and her kitty picked me as the winner... you can read the hilarious blog entry about the choosing of the name here.

The photo does NOT do it justice...isn't that the case with all lampwork? In person, the pale colors range from a pretty baby blue to a smattering of olive. It's a stunner! I just love and treasure it!
But that's not all. Melissa Mesara at One Earred Pig was having a drawing for the followers of her Facebook Fan page. And what do you know? I won the drawing. She didn't really advertise what she was mailing out and my heart leaped a beat when I opened the box and saw this:

It's so gorgeous!
Nothing like having some new glass to sport about town on these lovely spring days!
Monday, March 29, 2010
Anticipation - It's Making Me Wait
I'm giggling as I write this because I actually looked up the definition of anticipation - the theme of my second Art Bead Scene Blog Carnival post.Webster's defines anticipation as " the act of looking forward; especially : pleasurable expectation."
I don't know that I've EVER associated the word "pleasurable" with anticipation. There's NOTHING pleasurable about it. I would call it "tortuous expectation."
First of all, wait has never been my favorite word. I want it right NOW ...or yesterday would be better. So that I choose to work in a medium (glass) that requires some cooling down time is perplexing. It's so NOT me.
 And...sometimes they look worse! This bead idea came from one of my best selling fused pieces. It doesn't work as well as a torched bead...
The painful expectation continues when I finally do get to open that door...will the beads look as good as I thought they might going in??? (Glass changes colors when it's hot and the length of the time in the kiln can affect color too.) Will I be happy or sad when I open that door? Will I love it? Or will it be a disaster??? Will the beads work as I intended??? Or will all my hard work fall apart in my hands?
Some days, the anticipation leads to elation. Other days, I swear I need to sell my torch! No matter what, I always seem to find a new avenue I want to explore, a color I want to try, a scale I want to play with. And I find myself, staring at the kiln one more time, wrapped in the throes of tortuous expectation yet again.
I don't know that I've EVER associated the word "pleasurable" with anticipation. There's NOTHING pleasurable about it. I would call it "tortuous expectation."
 |  |
First of all, wait has never been my favorite word. I want it right NOW ...or yesterday would be better. So that I choose to work in a medium (glass) that requires some cooling down time is perplexing. It's so NOT me.
It kills me to know that I made a bead that I cannot touch, feel, marvel at right NOW. I have gone to bed and been unable to sleep and found myself bundled up in a housecoat and winter coat to traipse across my yard to the shop...just to see... knowing full well the kiln had not had enough time to ramp down. Sometimes I sit there staring at it, making sure it is ramping down...willing it to ramp faster.
 And...sometimes they look worse! This bead idea came from one of my best selling fused pieces. It doesn't work as well as a torched bead...
 The painful expectation continues when I finally do get to open that door...will the beads look as good as I thought they might going in??? (Glass changes colors when it's hot and the length of the time in the kiln can affect color too.) Will I be happy or sad when I open that door? Will I love it? Or will it be a disaster??? Will the beads work as I intended??? Or will all my hard work fall apart in my hands?

Some days, the anticipation leads to elation. Other days, I swear I need to sell my torch! No matter what, I always seem to find a new avenue I want to explore, a color I want to try, a scale I want to play with. And I find myself, staring at the kiln one more time, wrapped in the throes of tortuous expectation yet again.
Friday, March 26, 2010
Build a Better Basket
Well darn! My own dog tagged me in a blog post! Since this raises money for a GREAT cause, I'm going to repost Mabel's blog entry here:
Mabel Lou here. My friend Twinkie tagged me in her blog. I don't really have my own blog - I just borrow Mom's from time to time. (Mom? Why not? Twinkie has one? Because we would spend even more time on the computer and less time hiking. Oh... so it's a good thing I don't have my own blog!)
Funny, but I thought THIS was tagging:
 That's me with Twinkie and her big sissy Linguini. Her other sister, Frankie, was running with us too.
Mabel Lou here. My friend Twinkie tagged me in her blog. I don't really have my own blog - I just borrow Mom's from time to time. (Mom? Why not? Twinkie has one? Because we would spend even more time on the computer and less time hiking. Oh... so it's a good thing I don't have my own blog!)
Funny, but I thought THIS was tagging:
 That's me with Twinkie and her big sissy Linguini. Her other sister, Frankie, was running with us too.
 But Mom tells me tagging is played on blogs too. Twinkie knows that I would love to have a boy of my very own. Mom says that's never gonna happen so Twinkie suggested I do something to help children by playing this tag game.
A company that makes chocolate...something my mom never shares with me but seems to love so much is donating money to an amazing charity. The organization they're supporting is the Children's Miracle Network, a non profit that raises funds for children's hospitals.
 Hershey's will donate to the Children's Miracle Network $10 for every blog post about this blog-hopping event that ends on April 4th. So, everybody feel free and encouraged to join Hershey's Better Basket Blog Hop and help raise $5,000 for the Children's Miracle Network.
 I'm only going to anyone. But if you want to join in the fun, here are the rules:
HERSHEY’S BETTER BASKET BLOG HOP RULES
Oh and one more thing: My pal Twinkie is hosting the Global Animal Blogging Event (GABE) coming up in a few weeks. It's going to be lots of fun to participate! If you blog about animals, check it out!
A company that makes chocolate...something my mom never shares with me but seems to love so much is donating money to an amazing charity. The organization they're supporting is the Children's Miracle Network, a non profit that raises funds for children's hospitals.
Hershey's will donate to the Children's Miracle Network $10 for every blog post about this blog-hopping event that ends on April 4th. So, everybody feel free and encouraged to join Hershey's Better Basket Blog Hop and help raise $5,000 for the Children's Miracle Network. I'm only going to anyone. But if you want to join in the fun, here are the rules:
HERSHEY’S BETTER BASKET BLOG HOP RULES
- Copy and paste these rules to your blog post.
- Create a blog post giving a virtual Easter Basket to another blogger – you can give as many Virtual Baskets as you want.
- Link back to person who gave you an Easter Basket.
- Let each person you are giving a Virtual Easter Basket know you have given them a Basket.
- Leave your link at BetterBasket.info/BlogHop comment section. You can also find the official rules of this #betterbasket blog hop, and more information about Better Basket with Hershey’s there.
- Hershey’s is donating $10 per each blog participating to the Better Basket Blog Hop to Children’s Miracle Network (up to total of $5,000 by blog posts written by April 4th, 2010).
- Please note that only one blog post by each blog url will count towards the donation.
Oh and one more thing: My pal Twinkie is hosting the Global Animal Blogging Event (GABE) coming up in a few weeks. It's going to be lots of fun to participate! If you blog about animals, check it out!
Table Tut for Blogger
One the things I like best about being a Fire Diva (besides our amazing twitter!) is that we are all beadmakers helping each other. We market each other's work and grow as individual artists. And then, we have a private chat area where we help each other with "other stuff" - from what works on which selling venue to what color of glass to use for a specific project. I seem to be the html guru...which is really sad!
Some of us have been discussing using tables in the blog to show off more photos and since blogger is a moody beast and we can't bold or italicize in our private group, a blog post is in order.
When adding a table to blogger, work in the html tab.
A basic table with two rows and two columns would look like this in html code:

So now for some plain English - the blue is my comments. I will leave off the <> symbols so the text will appear:
table Signifies the beginning of a table
tbody Denote the body of the table... as opposed to a header
tr = Table Row
td /td = beginning and end of the first table cell. We place the info in the table cells. / always signifies the end of something.
td /td /tr Another cell and the end of the first row.
tr New table row.
td /td Table Cell
td /td /tr Table Cell & End of 2nd row. End of the Table Body./span>
/table End of Table.
So all info gets placed between a td and a /td and all commands are placed inside a <>.
In a simple world, this would all be well and good... but blogger is NOT a simple world. First of all, our Fire Divas blog is base on three columns and we can't have a table wider than our blog content. Since our content takes up 50% of the page, we have to tell the table how wide to be:
So in theory, you could just start plugging photos into all the sections and on the next table row you could write about the photos on the row above. Only... this is blogger and it goes all akimbo and...another downside is you can't really work on the Compose page and see what you are doing.
But note the alignment of the text... even though it is placed in the cell right below the photo, the text doesn't align... this is blogger glitch because this would align perfectly on another website.
So to fix the problem of seeing where you are working, we add a border each cell. See first line of code... Table border = "1"

This is what the table in the compose window of blogger looks like;

You can see the table cells where you are working! You still have the good part of working in blogger. To add a photo, click the photo icon, paste your image location from Etsy / AF / 1KM into the right side of the uploader. Click upload and the image is at the top of the page. Click on the image. Edit /cut and go to the table cell and paste it. To fix the alignment issue, hit enter and begin typing. Then hold the shift key down, click on your photo and drag the corner in to make the picture smaller. Your work window will look like this:

From this point, it's just like working in happy blogger. Highlight the text and paste in the link. Center the photos and text, etc.
And the final table will look like this:
By using table cells that you can see, it's much easier to work in the blogger compose window and most importantly, you can show off MORE BEADS!!!
Some of us have been discussing using tables in the blog to show off more photos and since blogger is a moody beast and we can't bold or italicize in our private group, a blog post is in order.
When adding a table to blogger, work in the html tab.
A basic table with two rows and two columns would look like this in html code:

So now for some plain English - the blue is my comments. I will leave off the <> symbols so the text will appear:
table Signifies the beginning of a table
tbody Denote the body of the table... as opposed to a header
tr = Table Row
td /td = beginning and end of the first table cell. We place the info in the table cells. / always signifies the end of something.
td /td /tr Another cell and the end of the first row.
tr New table row.
td /td Table Cell
td /td /tr Table Cell & End of 2nd row. End of the Table Body./span>
/table End of Table.
So all info gets placed between a td and a /td and all commands are placed inside a <>.
In a simple world, this would all be well and good... but blogger is NOT a simple world. First of all, our Fire Divas blog is base on three columns and we can't have a table wider than our blog content. Since our content takes up 50% of the page, we have to tell the table how wide to be:

So in theory, you could just start plugging photos into all the sections and on the next table row you could write about the photos on the row above. Only... this is blogger and it goes all akimbo and...another downside is you can't really work on the Compose page and see what you are doing.
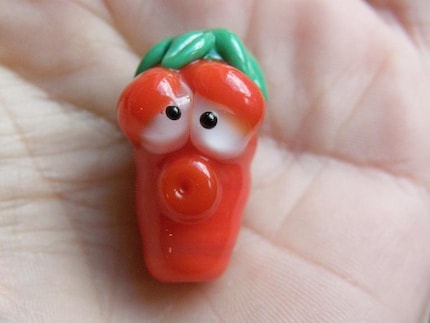 Ankle Biter's Kay Rot Ankle Biter's Kay Rot | 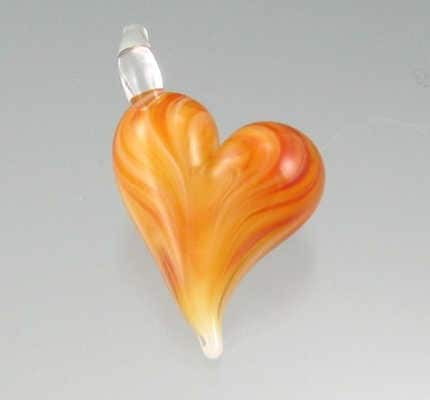 Gia Pet's Boro Heart Gia Pet's Boro Heart |
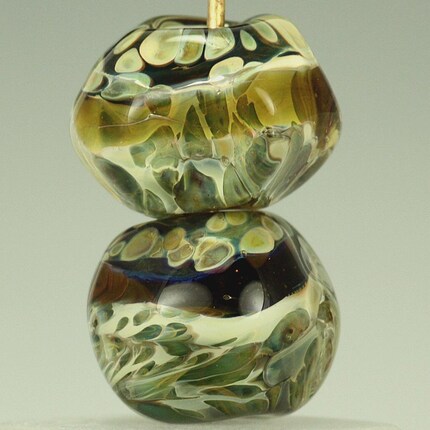
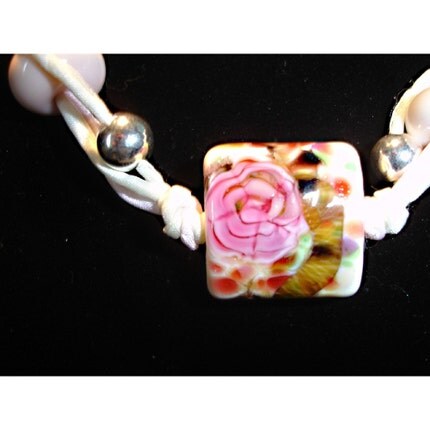
So to fix the problem of seeing where you are working, we add a border each cell. See first line of code... Table border = "1"

This is what the table in the compose window of blogger looks like;

You can see the table cells where you are working! You still have the good part of working in blogger. To add a photo, click the photo icon, paste your image location from Etsy / AF / 1KM into the right side of the uploader. Click upload and the image is at the top of the page. Click on the image. Edit /cut and go to the table cell and paste it. To fix the alignment issue, hit enter and begin typing. Then hold the shift key down, click on your photo and drag the corner in to make the picture smaller. Your work window will look like this:

From this point, it's just like working in happy blogger. Highlight the text and paste in the link. Center the photos and text, etc.
And the final table will look like this:
 | |
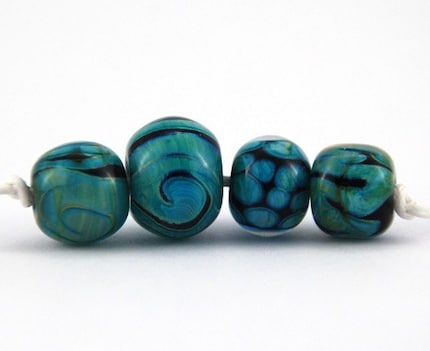 Janel Dudley's Set Janel Dudley's Set | 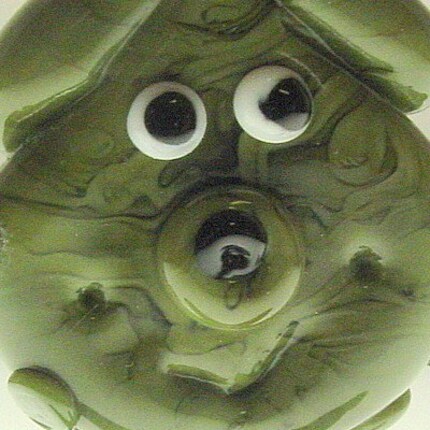 Teasebead's Alien Pet Teasebead's Alien Pet |
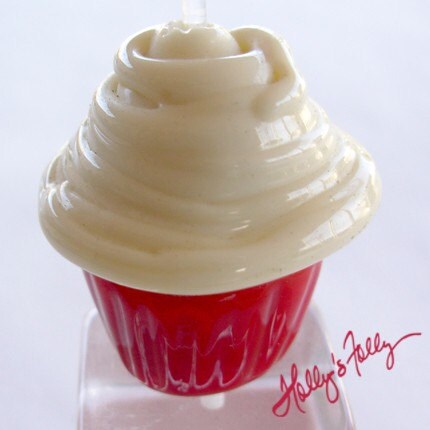
By using table cells that you can see, it's much easier to work in the blogger compose window and most importantly, you can show off MORE BEADS!!!
Thursday, March 25, 2010
Jacked Up Tools: Key Mandrel
I'm sure my regular readers know that I love to jimmy with my tools. I'm forever finding a way to make something work for another technique or make a tool work better.
I fell in LOVE with Jelveh's Key Mandrels. I first tried making beads on a key ages ago and was immediately turned off by how hard it was to shape a bead when you could not spin the "mandrel" - in this case, the key itself - evenly. Then came the key mandrels. I bought two and kept them loaded with keys in case the muse hit during a torch session. I love the tool!
But I'm never one to leave well enough alone... I recently invested in a Carlo Dona Bellflower press. I say invested because it's the priciest tool in my shop. I got on a waiting list for it months and months ago when I had a little extra cash... and it arrives from Italy when I'm broke. But a commitment is a commitment and that's what credit cards are for, right?
It had been so long since I looked at the tool, I had to take it down to my pal Donna for a quick refresher course. I was in love with what it could do... but, my red head sensibilities (it's a proven fact, red heads feel more pain than people with other coloring!) simply would not allow me to hold the wire in my fingers as I applied hot glass. I had burnt my fingers once doing that... the wire got so hot, SO fast... I said NEVER again!
I came home and tried placing the wire in a hemostat...hated it! So I started looking around for something better... something round that could hold a piece of wire. A pin vise would work...but I didn't have one. (Many lampworkers use a pin vise for making bellflowers.) Then I saw those key mandrels, ready to go. Hmmm...
I took our my round nose pliers and place a U in the bottom of the wire and secured it between the metal plate and the back of the mandrel. It WORKED! But I didn't like only being able to make two at a time... So... I tried cutting the wire to 7" in length. My thinking was that I could make one, place the flower in the kiln with the key mandrel sticking out, cut the wire in half and go back to the torch for #2; Cut off #2 and have a piece of scrap left on the mandrel. Quench, open the tool, release the scrap and hook on another wire.
This worked except, 7" gets a little unwieldy with hot molten glass on the end! I now cut the wire a hair over 6". I can still make two bellflowers without having to mess with the tool. Since I have two key mandrels, I can make four, set the mandrels aside to cool and reload them with wire after making a few beads!
 Here are some leaves, also made with the key mandrel and a leaf press. Next are the two bellflowers still in my key mandrels and the bottom flower with a U hook in the wire. I cut that part off.
The teal bellflower is to be part of this month's Art Bead Scene entry...Wonder what these will be??? I better get moving! See you Monday on the Bead Blog!

I fell in LOVE with Jelveh's Key Mandrels. I first tried making beads on a key ages ago and was immediately turned off by how hard it was to shape a bead when you could not spin the "mandrel" - in this case, the key itself - evenly. Then came the key mandrels. I bought two and kept them loaded with keys in case the muse hit during a torch session. I love the tool!

But I'm never one to leave well enough alone... I recently invested in a Carlo Dona Bellflower press. I say invested because it's the priciest tool in my shop. I got on a waiting list for it months and months ago when I had a little extra cash... and it arrives from Italy when I'm broke. But a commitment is a commitment and that's what credit cards are for, right?
It had been so long since I looked at the tool, I had to take it down to my pal Donna for a quick refresher course. I was in love with what it could do... but, my red head sensibilities (it's a proven fact, red heads feel more pain than people with other coloring!) simply would not allow me to hold the wire in my fingers as I applied hot glass. I had burnt my fingers once doing that... the wire got so hot, SO fast... I said NEVER again!
I came home and tried placing the wire in a hemostat...hated it! So I started looking around for something better... something round that could hold a piece of wire. A pin vise would work...but I didn't have one. (Many lampworkers use a pin vise for making bellflowers.) Then I saw those key mandrels, ready to go. Hmmm...
I took our my round nose pliers and place a U in the bottom of the wire and secured it between the metal plate and the back of the mandrel. It WORKED! But I didn't like only being able to make two at a time... So... I tried cutting the wire to 7" in length. My thinking was that I could make one, place the flower in the kiln with the key mandrel sticking out, cut the wire in half and go back to the torch for #2; Cut off #2 and have a piece of scrap left on the mandrel. Quench, open the tool, release the scrap and hook on another wire.
This worked except, 7" gets a little unwieldy with hot molten glass on the end! I now cut the wire a hair over 6". I can still make two bellflowers without having to mess with the tool. Since I have two key mandrels, I can make four, set the mandrels aside to cool and reload them with wire after making a few beads!
 Here are some leaves, also made with the key mandrel and a leaf press. Next are the two bellflowers still in my key mandrels and the bottom flower with a U hook in the wire. I cut that part off.
The teal bellflower is to be part of this month's Art Bead Scene entry...Wonder what these will be??? I better get moving! See you Monday on the Bead Blog!

Wednesday, March 24, 2010
Inspiration for Your Creations!
The Fire Divas Quarterly Jewelry Challenge is underway! We've already had a few entries and we are hoping for MORE! If you use Fire Diva beads in your creations, I urge you to enter!!! The prizes are AWESOME! I would SO love to see some of my own beads in there!!! I've never seen ONE photo of my beads in someone else's jewelry... so make my dream come true!!!!
The theme is Spring and there are lots of fabulous prizes to win, all shown in this thread. We're excited, and we know you are too. To tide you over, we thought we would give you a little "eye candy" to help inspire beautiful creations for the challenge! These are all pieces made by our very own Fire Divas, using their own breathtaking lampwork. Enjoy!


The best part is...we have more to come! Look for another inspirational blog post next week featuring more incredible work from our lovely and talented Fire Divas!
The theme is Spring and there are lots of fabulous prizes to win, all shown in this thread. We're excited, and we know you are too. To tide you over, we thought we would give you a little "eye candy" to help inspire beautiful creations for the challenge! These are all pieces made by our very own Fire Divas, using their own breathtaking lampwork. Enjoy!


The best part is...we have more to come! Look for another inspirational blog post next week featuring more incredible work from our lovely and talented Fire Divas!
Tuesday, March 23, 2010
Growing the Skillset
The other week, I wrote this post about sculptural beads. The post started a chat on Facebook about skills from one art form being useful in another. I agree wholeheartedly.
I never really thought of myself as an artist. I viewed myself as more the crafty type. I could make just about anything I set my mind to. It was rubber stamping of all things that awakened an artist. When I got into stamping... I REALLY got into it. I was taking classes from renown teachers and yes, artists. And I was being exposed to better quality materials with each new project. Suddenly, I was not afraid to go into an art supply store to look around (as opposed to a Michael's).
But I still wouldn't call myself the A word. Not until I was working on a t.v. show...another craft show and it was my job to design many of the projects and do the step outs on all the projects, including those designed by others. (Step outs = "the magic of television" where something is magically completed and ready for another step.)
That much-needed job arrived in my lap when my childhood best friend and her family were coming for a month long visit. I was working on my back porch on both a sewing and a glass etching project when my friend said, "You were always an artist."
I balked at the comment. "I'm not an artist - I can't draw."
"What's THAT got to do with being an artist?"
"Uh... Everything!"
"NO, it doesn't... you sound just like old woman _________ (our childhood art teacher). She thought anyone who couldn't draw like Steve was hopeless. (Steve was a kid in school so talented he once got placed in all remedial high school classes because he was so bored taking yet another achievement test, he filled in all the boxes on his scantron to form a galloping horse!)
My friend continued...."Drawing is just one of many skills... skills come naturally to some but they can also be learned."
I realized she was right... I always had good ideas and never shied away from any project... as long as there was no drawing involved.
Not long after that, I found myself owning a rubber stamp company and my friend Becky twisted my arm to go along with her to become a certified PMC teacher. Immediately, I knew I hated the rubber stamps they were using to texturize the silver. By this point I had written and photographed a book, developing some crazy photoshop skills along the way. I still didn't think I could draw...but I could manipulate lines in photoshop. I came home from that class and within a month, had drawn 24 images and then sold the resulting rubber stamps to the PMC manufacturer! So much for the theory that I can't draw!
There is no question I am comfortable drawing digitally. I know I can clean anything up and make it look good in the computer. But I knew I wanted to know more about the principles of drawing. So I enrolled in a beginning class at night at my community college.
It was a challenge but it taught me more about "seeing" than I thought possible. Seeing it is the first part of doing.
I'm not exceptionally proud of these things...I would never hang them on my wall but I keep them to remind me of lessons learned.
 Still life drawings teach us to see relationships in perspective and size.
 An experiment in shading teaches value - seeing light and darkness.
The next two are both spatial studies... drawing the negative space around an object. By seeing the space between, you actually draw the object with a bit more accuracy because you're not all in your own head, concentrating on making the object perfect. Drawing nothing or nothingness...the space between, takes the pressure off.


So, no, I'm not going to find myself selling my sketches and paintings to gallery. But by being open to the process, I've overcome my fear of the one thing that held me back. And the skills learned in that class carry over into the art forms I do practice on a daily basis: photography and glass.
I never really thought of myself as an artist. I viewed myself as more the crafty type. I could make just about anything I set my mind to. It was rubber stamping of all things that awakened an artist. When I got into stamping... I REALLY got into it. I was taking classes from renown teachers and yes, artists. And I was being exposed to better quality materials with each new project. Suddenly, I was not afraid to go into an art supply store to look around (as opposed to a Michael's).
But I still wouldn't call myself the A word. Not until I was working on a t.v. show...another craft show and it was my job to design many of the projects and do the step outs on all the projects, including those designed by others. (Step outs = "the magic of television" where something is magically completed and ready for another step.)
That much-needed job arrived in my lap when my childhood best friend and her family were coming for a month long visit. I was working on my back porch on both a sewing and a glass etching project when my friend said, "You were always an artist."
I balked at the comment. "I'm not an artist - I can't draw."
"What's THAT got to do with being an artist?"
"Uh... Everything!"
"NO, it doesn't... you sound just like old woman _________ (our childhood art teacher). She thought anyone who couldn't draw like Steve was hopeless. (Steve was a kid in school so talented he once got placed in all remedial high school classes because he was so bored taking yet another achievement test, he filled in all the boxes on his scantron to form a galloping horse!)
My friend continued...."Drawing is just one of many skills... skills come naturally to some but they can also be learned."
I realized she was right... I always had good ideas and never shied away from any project... as long as there was no drawing involved.
Not long after that, I found myself owning a rubber stamp company and my friend Becky twisted my arm to go along with her to become a certified PMC teacher. Immediately, I knew I hated the rubber stamps they were using to texturize the silver. By this point I had written and photographed a book, developing some crazy photoshop skills along the way. I still didn't think I could draw...but I could manipulate lines in photoshop. I came home from that class and within a month, had drawn 24 images and then sold the resulting rubber stamps to the PMC manufacturer! So much for the theory that I can't draw!
There is no question I am comfortable drawing digitally. I know I can clean anything up and make it look good in the computer. But I knew I wanted to know more about the principles of drawing. So I enrolled in a beginning class at night at my community college.
It was a challenge but it taught me more about "seeing" than I thought possible. Seeing it is the first part of doing.
I'm not exceptionally proud of these things...I would never hang them on my wall but I keep them to remind me of lessons learned.
 Still life drawings teach us to see relationships in perspective and size.
 An experiment in shading teaches value - seeing light and darkness.
The next two are both spatial studies... drawing the negative space around an object. By seeing the space between, you actually draw the object with a bit more accuracy because you're not all in your own head, concentrating on making the object perfect. Drawing nothing or nothingness...the space between, takes the pressure off.


So, no, I'm not going to find myself selling my sketches and paintings to gallery. But by being open to the process, I've overcome my fear of the one thing that held me back. And the skills learned in that class carry over into the art forms I do practice on a daily basis: photography and glass.
Subscribe to:
Posts (Atom)





 Posts
Posts

