Showing posts with label Encasing. Show all posts

Monday, August 19, 2013

The Elusive Striped Bead

Ah... the striped bead. It has been my Holy Grail of lampworking. All these years in and I still suck! I still read tutorials and try one from time to time. But last week, it was just driving me nuts. I'm really good at some things... WHY can't I get THIS??? Grrrrrrr!

These are the ones I've deemed O.K. to show you: 
I always seem to have some color gap or a twist going on. I know the twist is heat control and the color gap must be volume control but when I've added the right size / equal amounts of glass, WHY do I still have this issue???

Well, the heat control turned out to be a bigger factor than I thought. I make big beads and... I LOVE to work hot and fast! Most of my big beads take me an hour or more to make! It seems really hard to justify "wasting" 5 - 10 minutes on ONE LITTLE bead!

So I sat down and read every tutorial I could find, one MORE time! And I finally made some decent stripes! See that pink and brown donut on the left... That bead has been in my head for a decade! 
Heat control is HUGE. I remember Kimberly Affleck demoing that she could tap her bead on her marver without smushing it before encasing! You can't case a soft bead and not have it distort. Working UNDER the flame is key!

And volume control... having equal size dots is imperative and still an issue!

But lastly...it's patience. After making these for an hour and a half, my old tricks started coming back. I was losing patience waiting for glass to melt and they started to distort again. The pink twisted one is the last one I made.... SIGH.
But it is FINALLY starting - just beginning- to click! OY!

These are links to the tuts that helped me:

Corina's Subtle Stripes
Basic Stripes by Melinda Melanson

Candice Mathewson's Cased Layered Triangle Bead
Karen Mitchell's Advice (Post #8)
Kandice Seeber's Striped Tutorial (for sale) 

Wednesday, August 4, 2010

The Eyes Have It

A while back I post this photo with little explanation other than a comment about finding my mojo again:
 I wanted to tell the story behind this bead and a few others.

I've never been one to "get" murrini. I've played with a few pieces and go "ick" and usually toss the bead in the water. I've never figured out how to use murrini with what I do. And sometimes, that's so frustrating. My goodness! My friend Lauren is such a murrini lover, she dedicates her Monday blog posts to murrini! And her work is amazing.

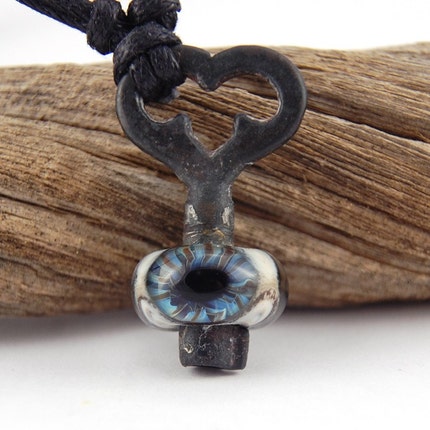
And my friend Janel makes the most amazing eye murrini and turns them into the most stunning necklaces:

Then Janel decided to write an Eye Bead Tutorial and asked me to try it out her way. She sent me some of her stunning eye murrini and some glass rods and OH MY! I was in LOVE!

These were my first attempts at Janel style eye beads:


First of all, I learned more about casing and what I was doing wrong from Janel's tut and I learned about coaxing that murrina to do what you want it to do. It's a great tut!!

But I never want to make a bead just like someone else does so I started trying to think of how I could use Janel's techniques. I've always been fascinated with eye beads. If you  don't know the history or meaning behind them, you may find them creepy.

Eye beads are meant to offer protection. Think of the third eye in Indian culture. The eye bead for protection is also really popular in Greece, Armenia and in Egypt. I've always been fascinated with Egyptian eyes and looked at lots of Egyptian artwork to come up with the background colors for that bead above. I also researched Egyptian symbolism to figure out what to put on the back.

I found out that a squared off version of a swirl... an image prevalent in all human art since the caveman era ... stands for home. What a better thing to offer protection over than home!

I loved the bead but got so entranced in the process of making it, I forgot a few steps! I wanted a casing of clear over the eye to magnify Janel's stunning murrina. And... it just seemed to be lacking something!

In the end, I realized that sand was probably a more fitting background as the bright colors of Egyptian art may not appeal to most customers. And I wanted it bigger! I do love those big beads!

Here's the final version:
And the back:


I'm finally excited about murrini thanks to Janel!

P.S. Her tut should be ready really soon!!!!

Thursday, January 21, 2010

Super Thin Casing

I was chatting with fellow Fire Diva about encasing beads. The subject of artists who use thin layers of casing came up.

The technique is called "Strip Casing" and while I have not totally mastered this to the point of sharing a bead, I thought I would share the sketch I made for my friend.

Instead of wrapping clear glass (blue) around the bead (purple) or laying thick strips down the bead, heat a gather, keep the rod at a sharp angle to the bead and cover the whole length (toward the left in the diagram) of the bead in one strip. Heat another gather and repeat. Keep the flame on the rod and not the bead during this process (except for flashing to keep the bead warm).

And MOST important: the sharper the angle of the rod to the glass, the less glass you will use. So, if you keep that rod at a 90 degree angle, you will use lots of glass. If the rod is almost parallel to the bead... much less glass.

So, do any of you strip case??? Send me some links to photos and I'll add them to the blog.

Now, as you may know, I'm in the fire, now flood, area of the mountains above Los Angeles. They have evacuated hundreds of my neighbors within a mile. And while a river does run through my studio, I am basically fine. Just damp and a little cranky! If you are interested in flood updates, I've been posting over on Creekhiker. Beadwise, I'll see you here on Monday.